

Prototyping case study
Chocolate decorating tool: three 3D-printed prototypes and the decision to stop
A client needed more copies of a small stainless-steel chocolate decorating tool. We measured the original, recreated it in CAD and explored three printed versions. The final prototype improved the design, but an unresolved breakage risk meant it did not proceed to production.
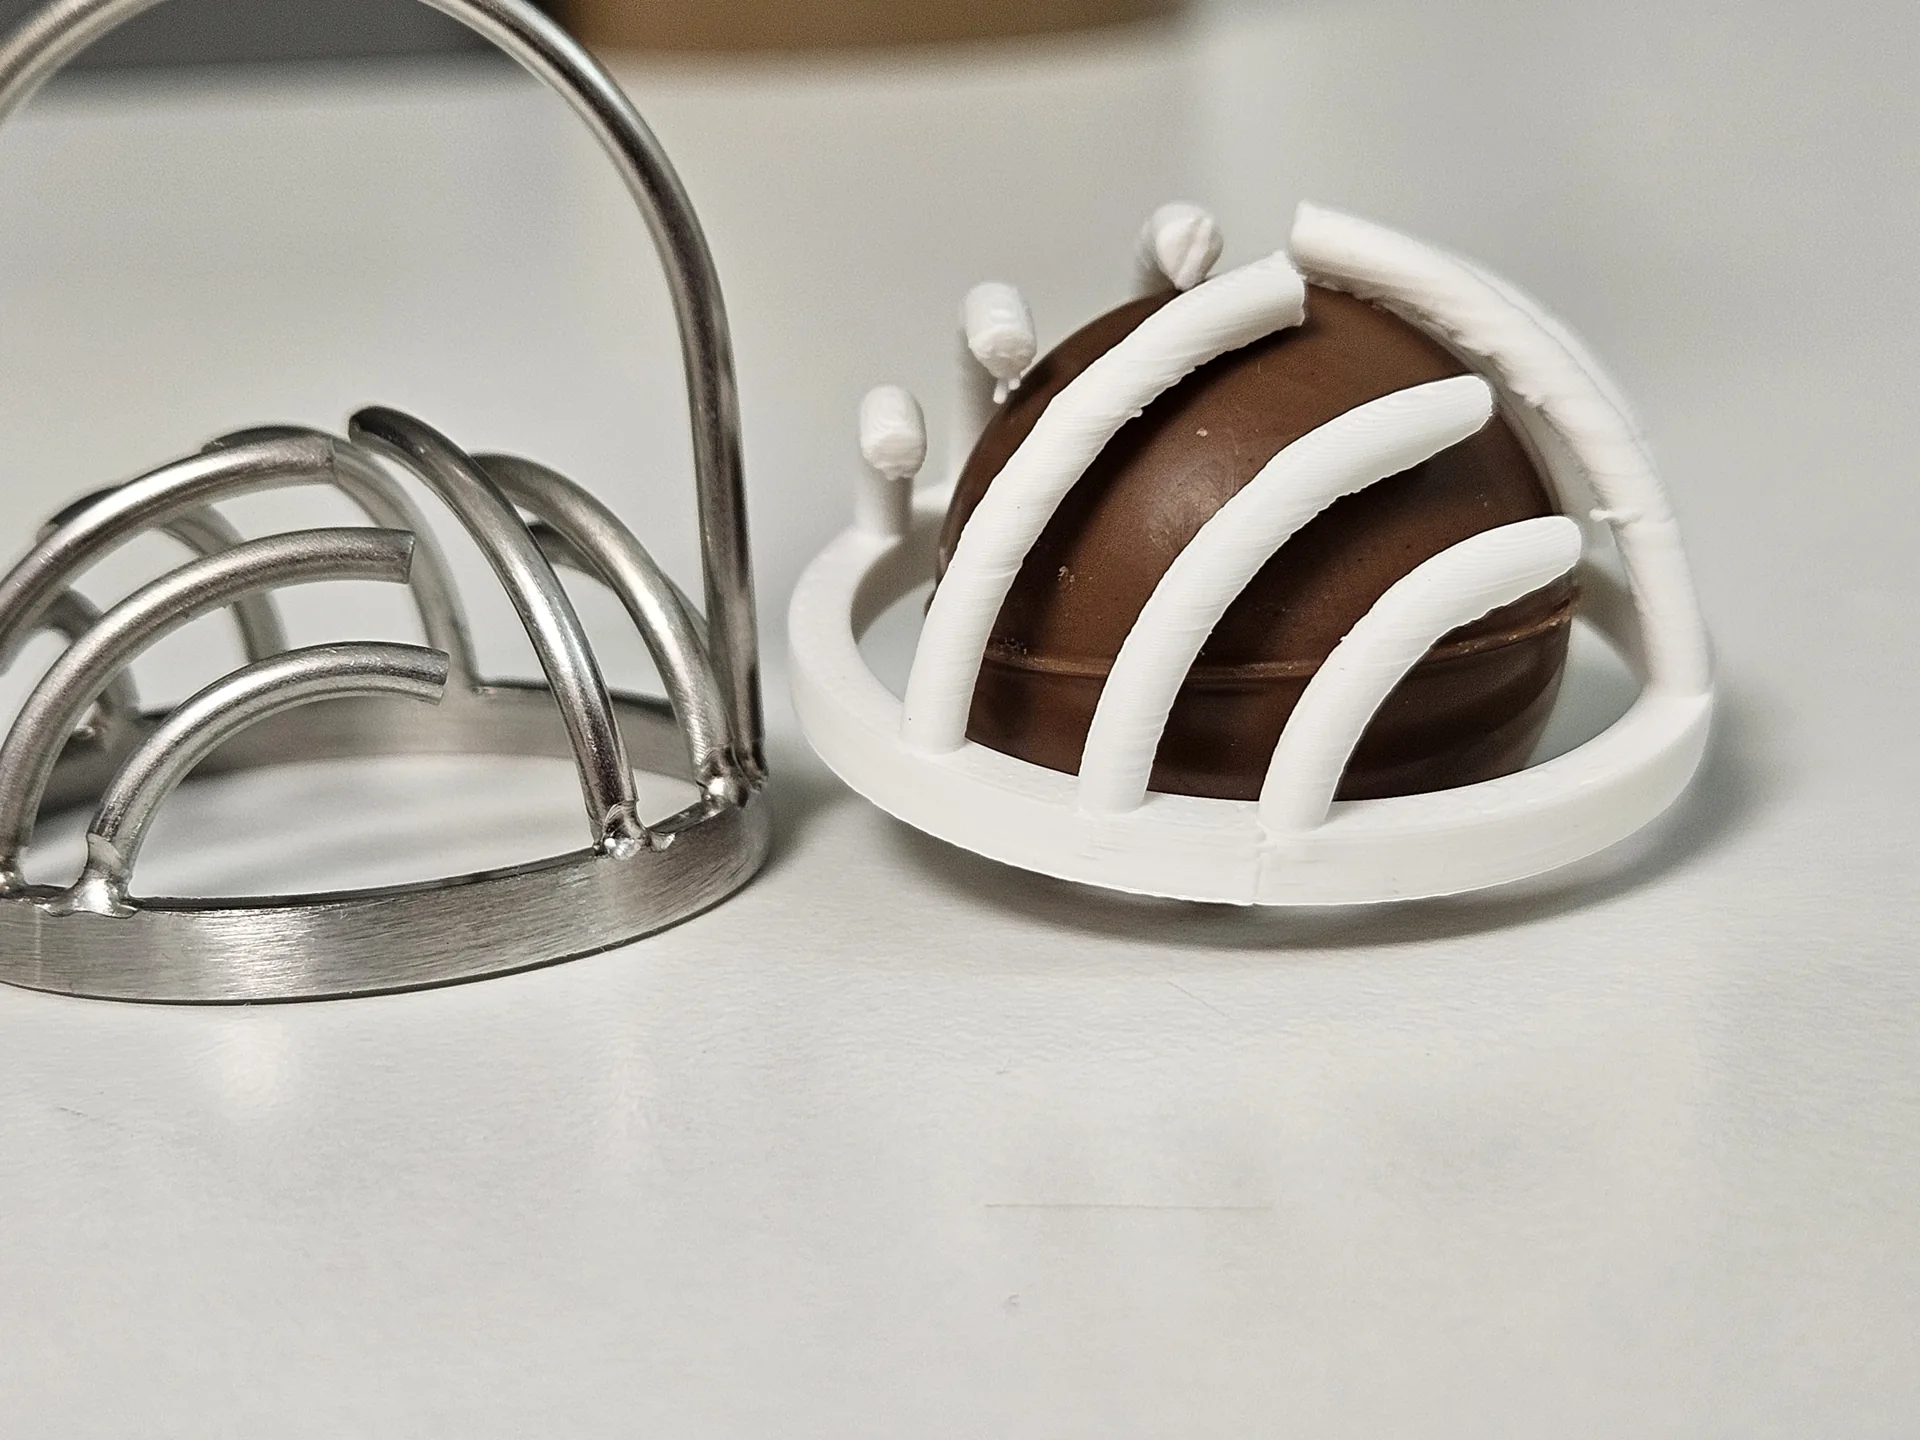
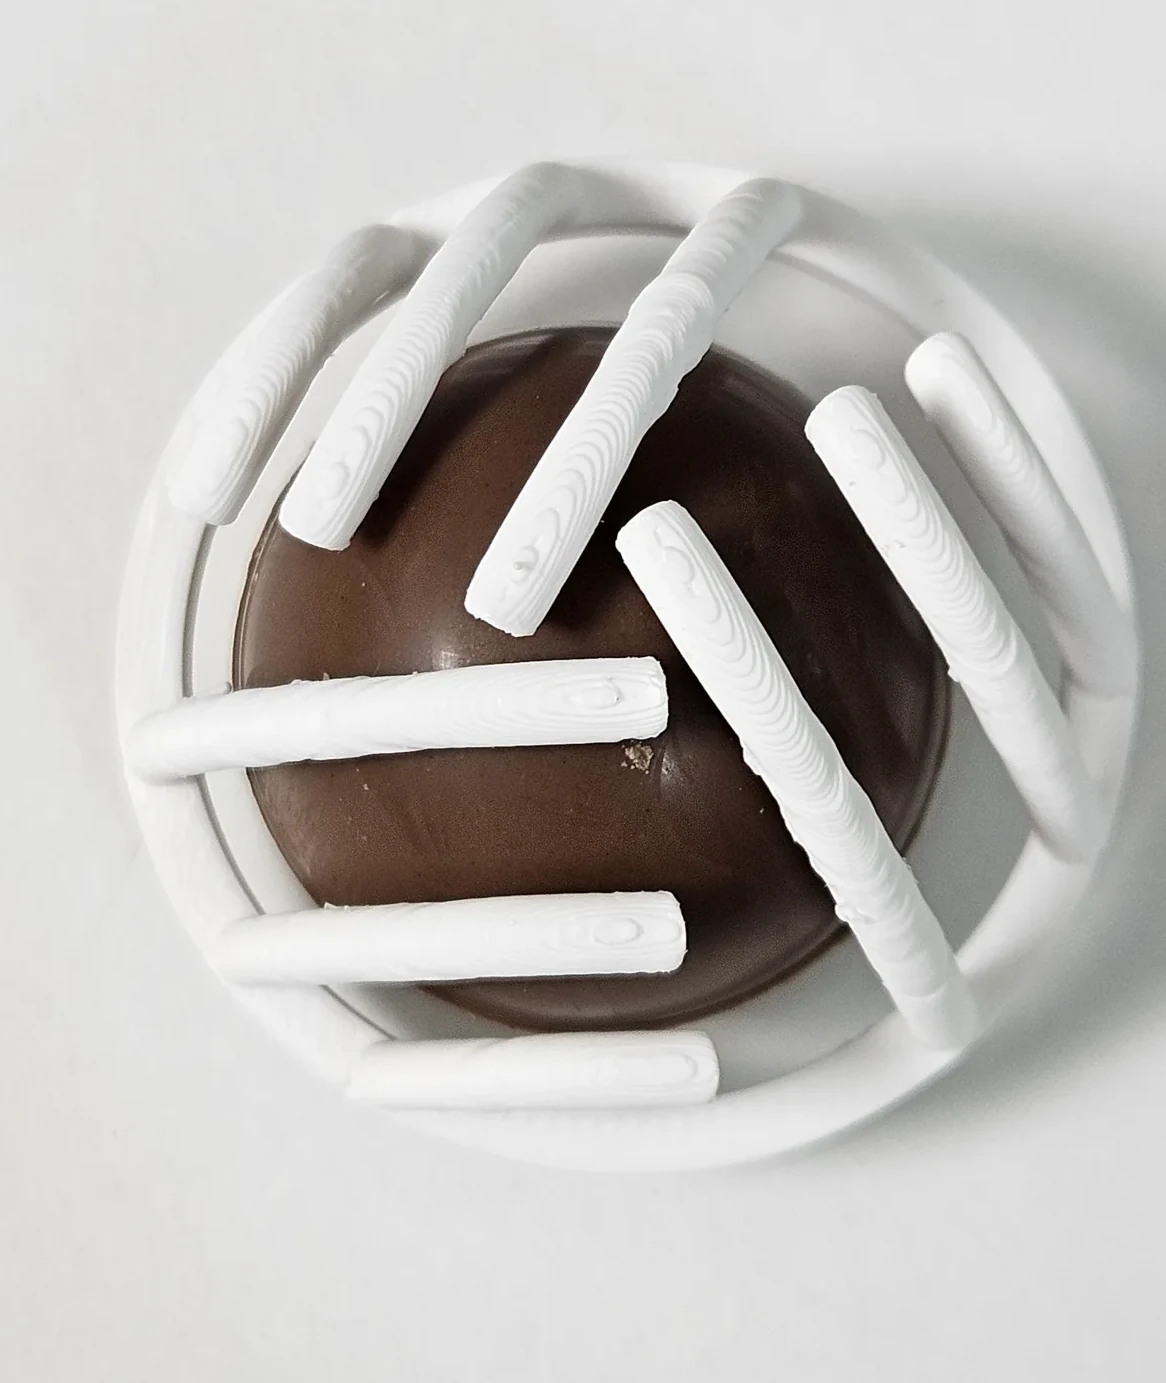
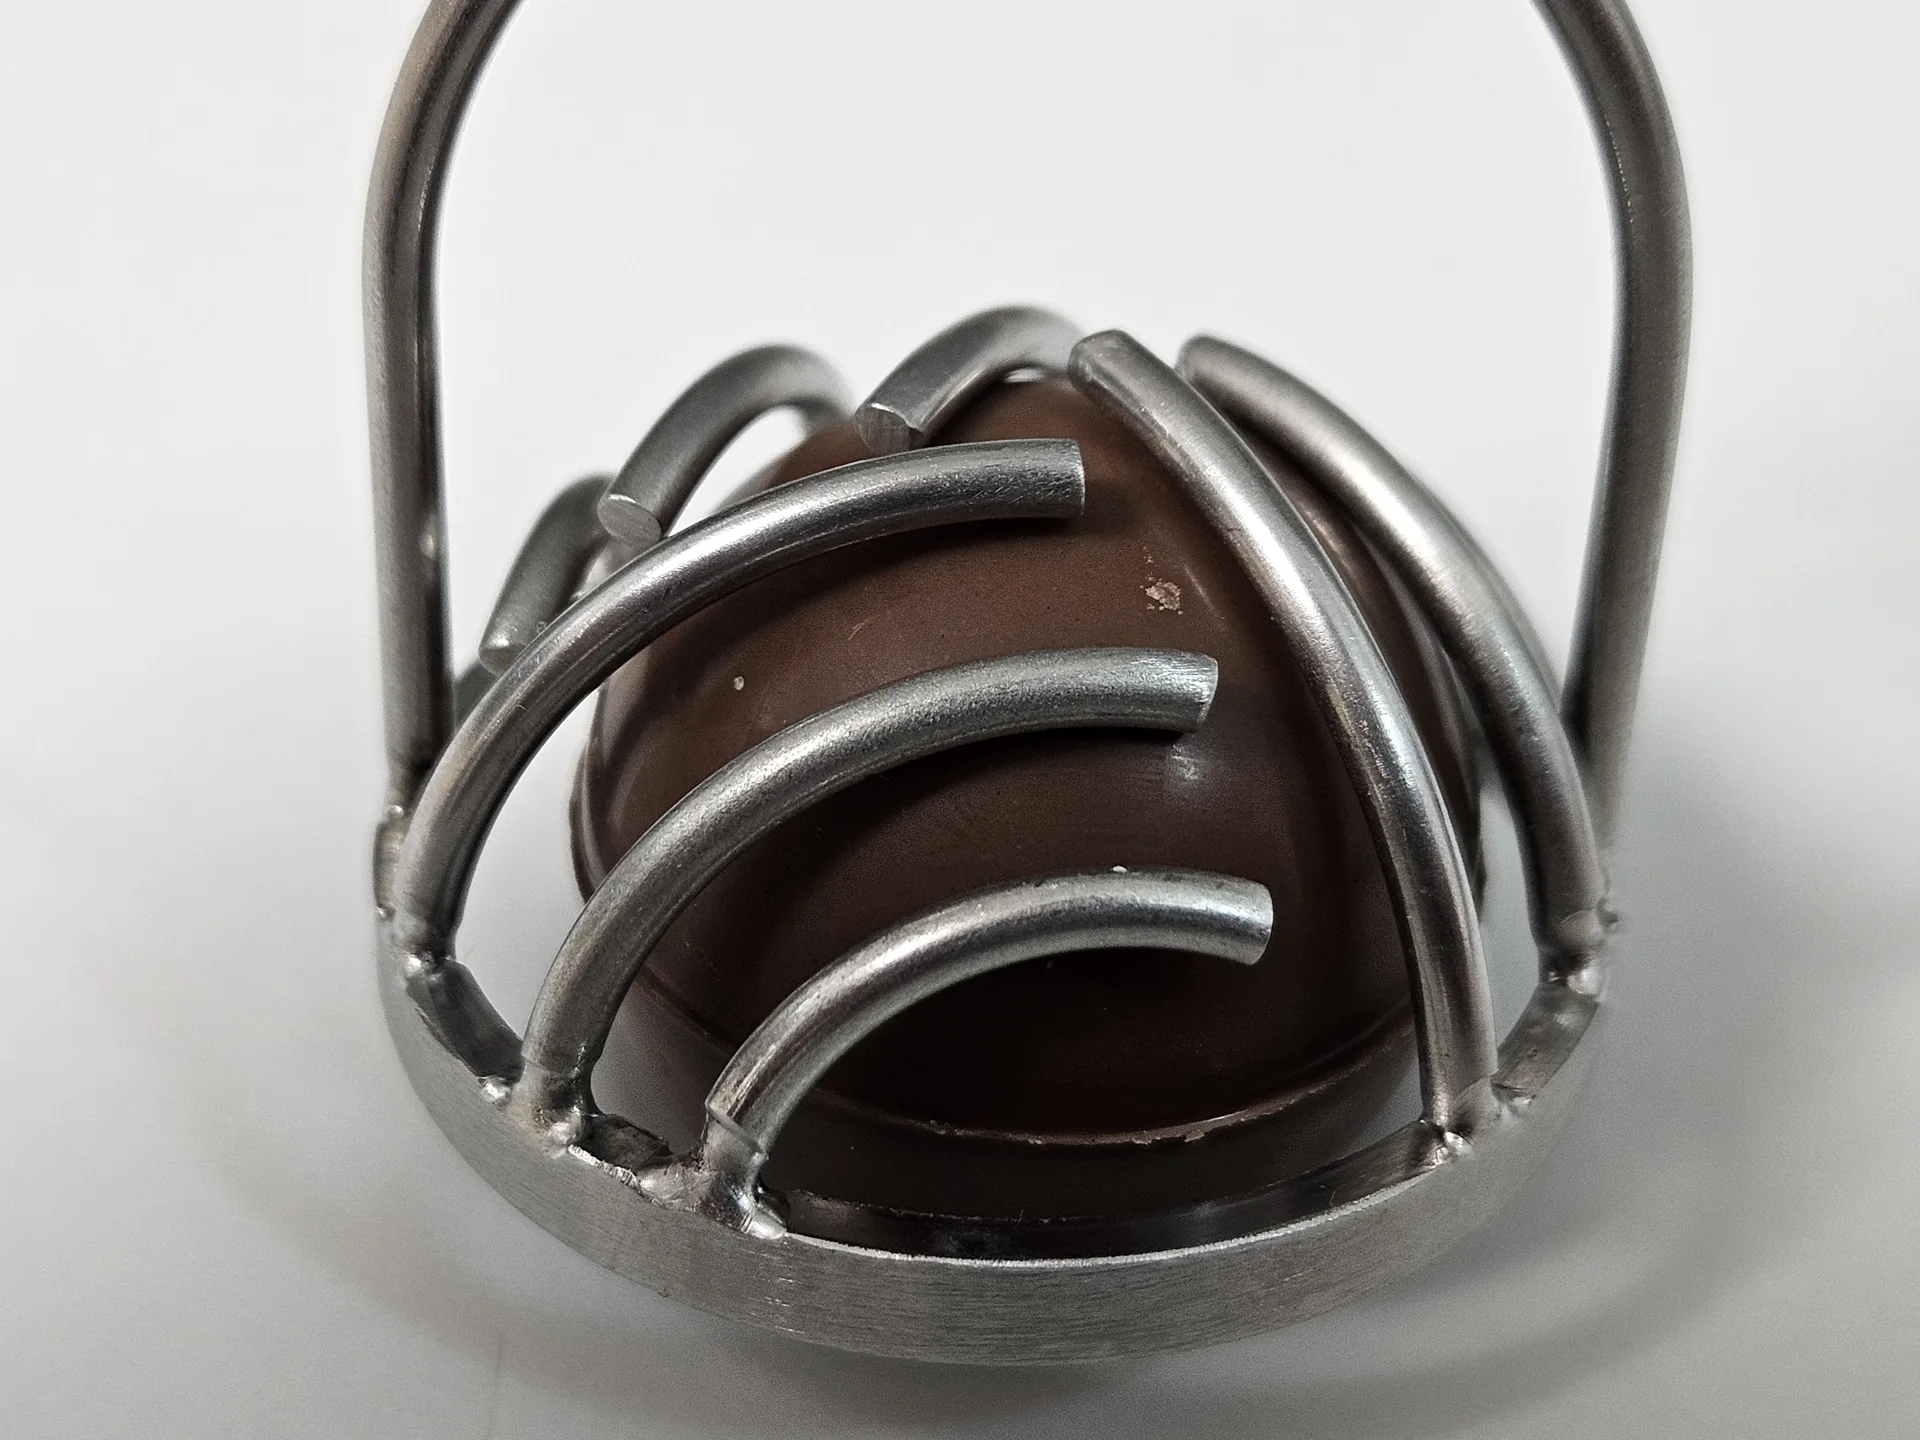
The supplied stainless-steel tool beside an early white PLA head fitted over a real chocolate sample. The photographs document prototype development; the printed tools were not accepted for production.
The project at a glance
This was a reverse-engineering and FDM prototyping study for a chocolate decorating tool. The working head has fine curved ribs intended to leave a striped pattern on a round chocolate. The customer supplied both the original metal tool and chocolate samples, giving us physical references for the shape and fit.
| Item | Project details |
|---|---|
| Client requirement | Approximately 5–10 additional tools |
| Starting point | A supplied stainless-steel tool and real chocolate samples |
| Design work | Manual measurements and a recreated CAD model |
| Prototype materials | White PLA, yellow PETG, then a reinforced white PETG head with a PLA handle |
| Main changes | Outer reinforcing ring, three handle supports and a threaded handle connection |
| Development pace | Typically 2–5 days between iterations, including shipping and discussion |
| Outcome | Production team declined the printed solution because of the risk of rib fragments breaking away |
| Commercial arrangement | No design or printing fee charged; the client covered shipping |
A small tool that was difficult to replace
The customer already had a metal tool that suited the task. Their problem was obtaining additional copies: they reported being unable to find a suitable source and wanted several tools so more people could carry out the decorating operation.
They posted the original to Bondar Labs, along with sample chocolates. We measured the tool by hand and recreated its geometry in CAD. The original provided the rib arrangement, curved profile and handle structure; the chocolates made it possible to compare how that geometry sat around the actual product.
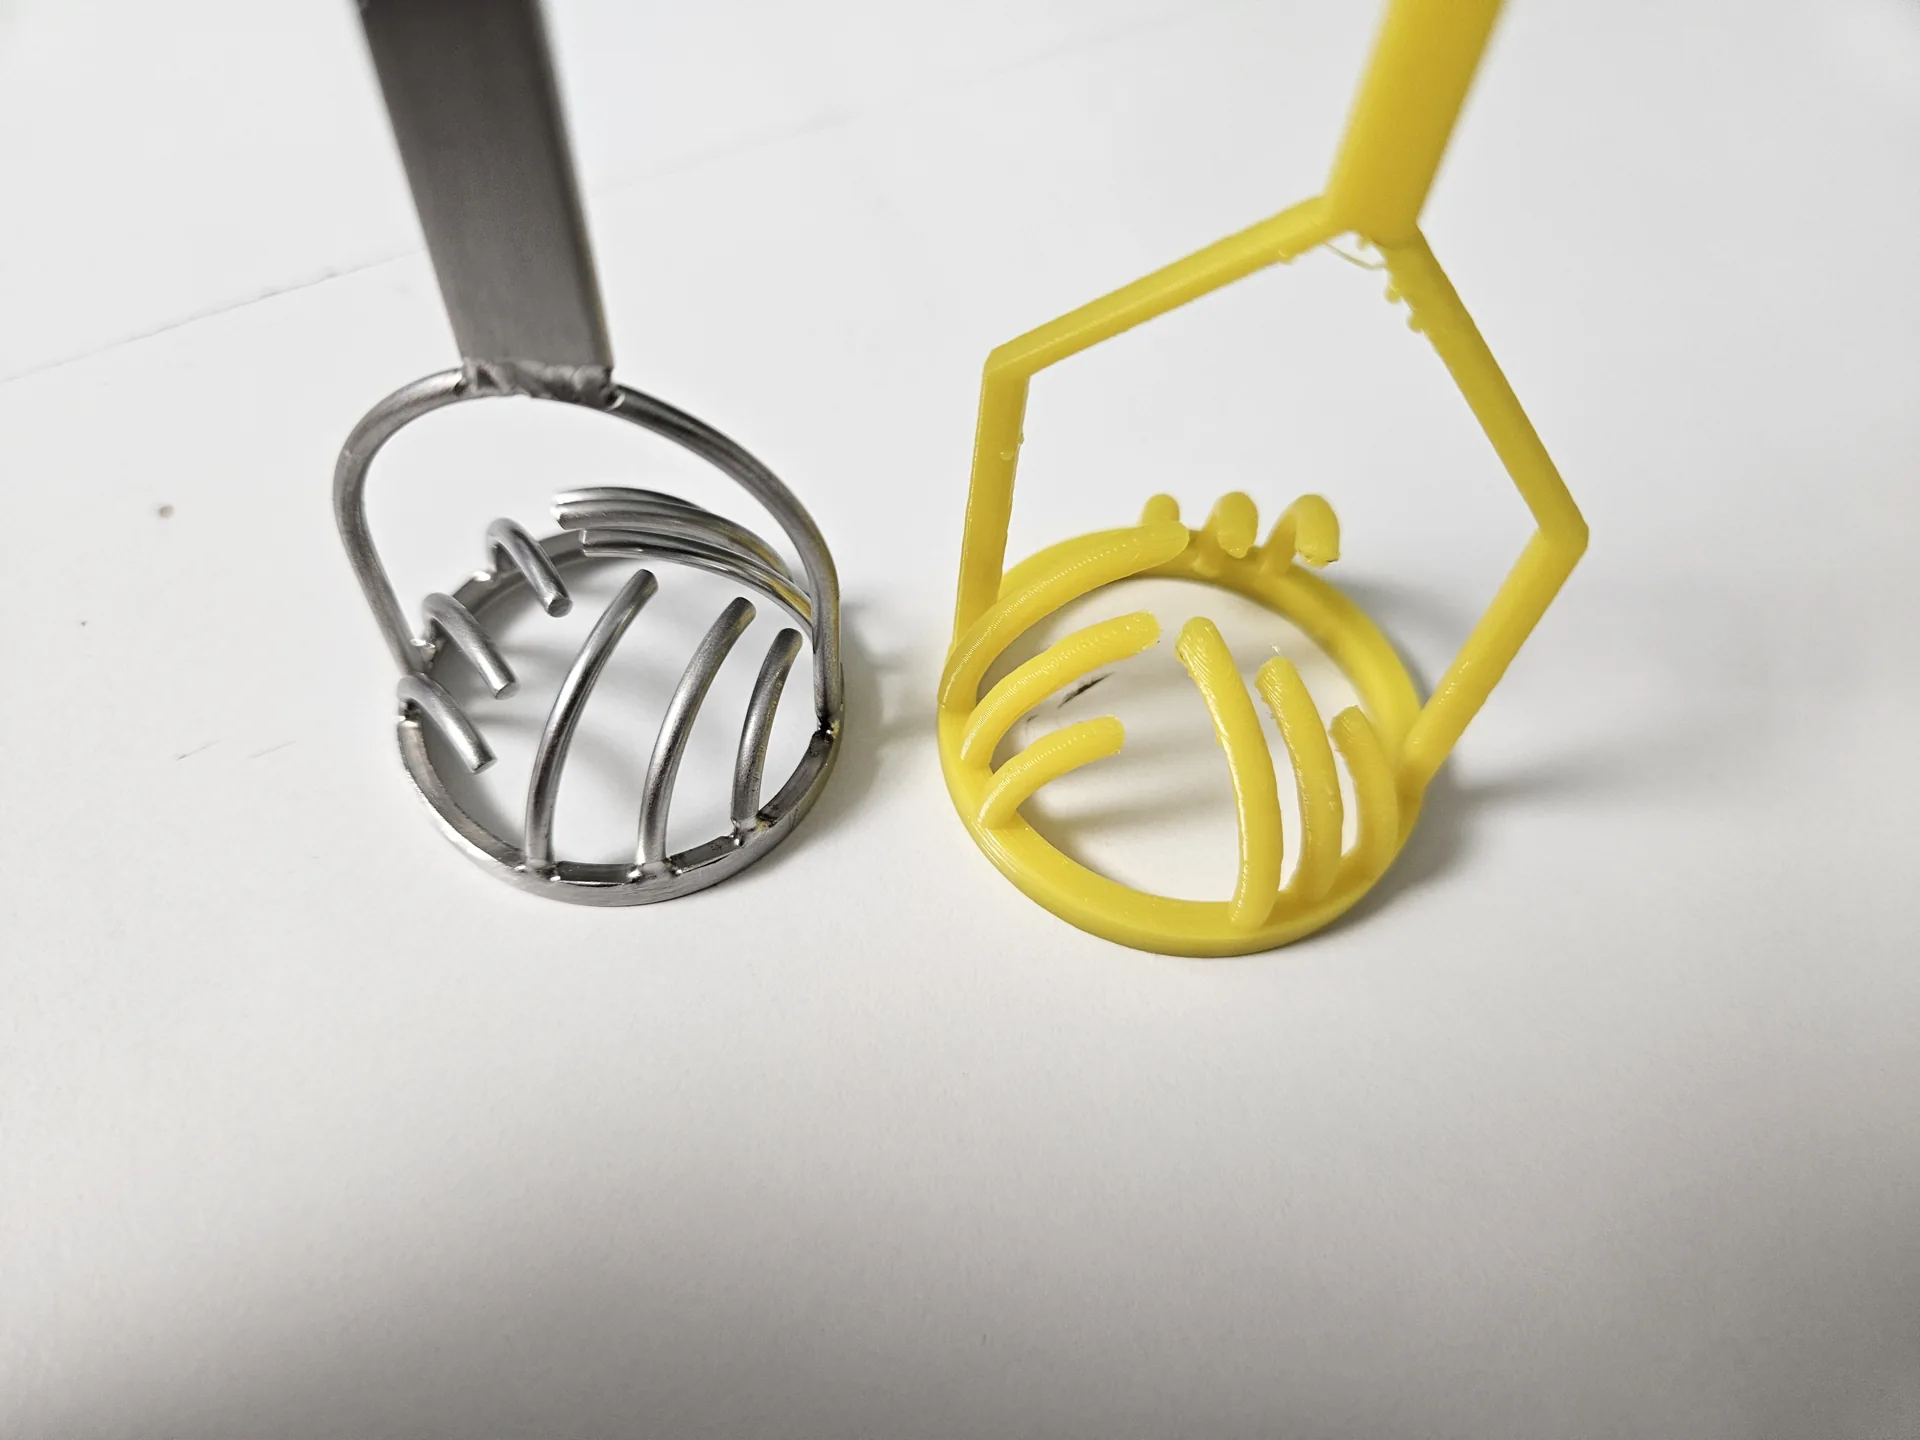
The brief concerned the decorating pattern and the tool’s physical fit. We did not establish the exact production sequence, such as whether the chocolate was still soft or the tool was dipped before use. The photographs below show fit checks, rather than evidence of a validated decorating process.
Three iterations: geometry, material and reinforcement
1. White PLA: checking the shape
The first material trial used white PLA. Some pieces were printed as heads only: the handle was unnecessary when the immediate question was how the ribs followed the chocolate’s surface. This kept the trials focused on the most demanding part of the tool.
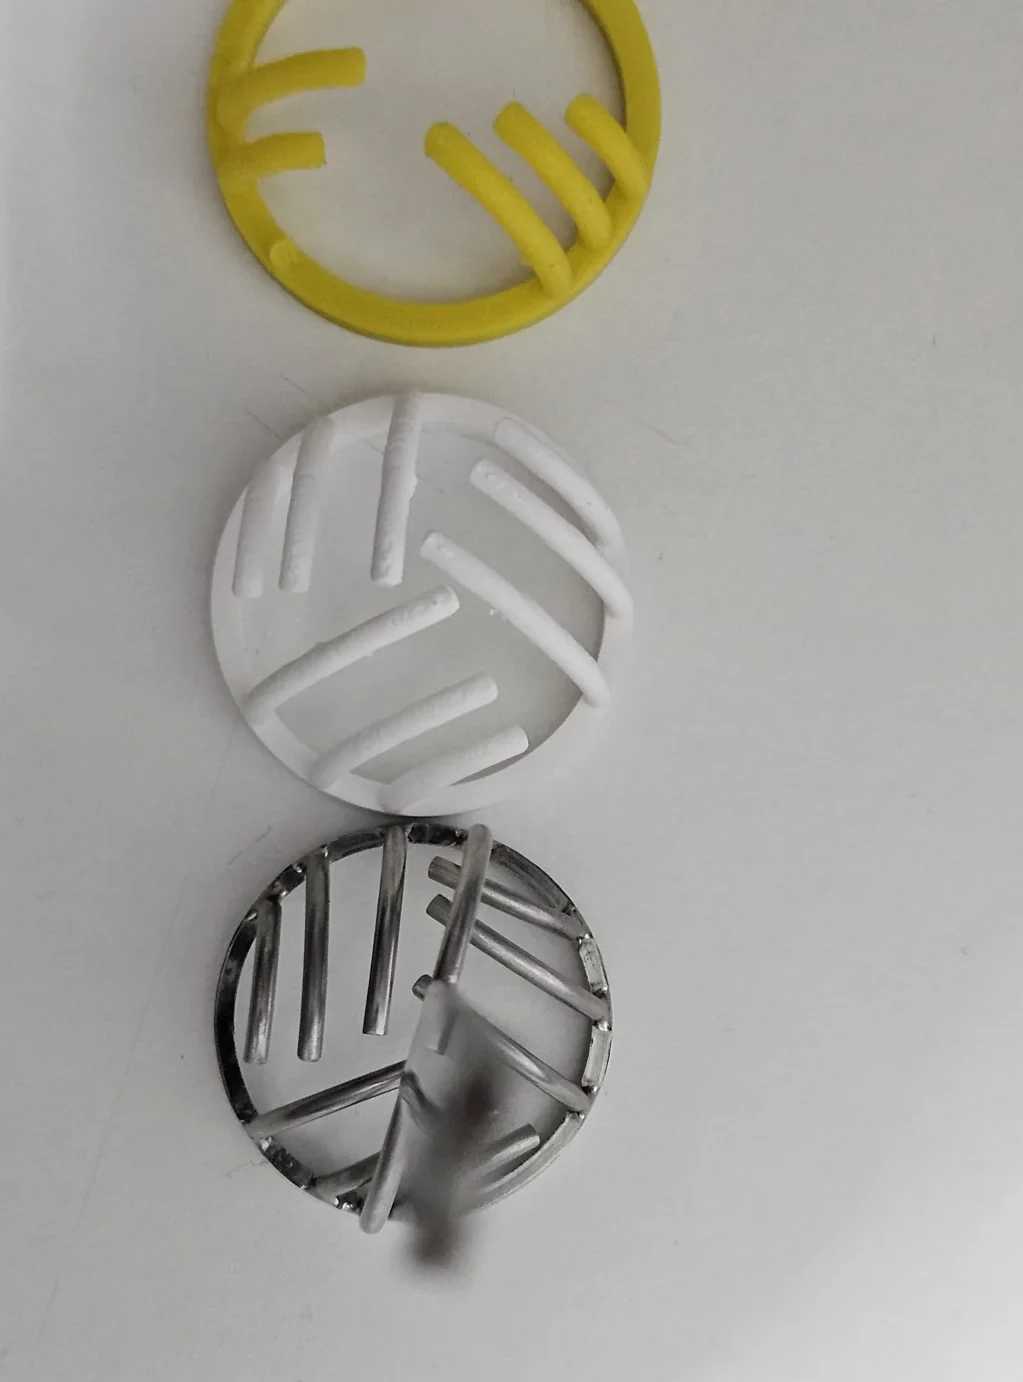
Comparing the printed head with the original and placing it over a supplied chocolate helped assess the overall shape. It also exposed the practical difficulty of reproducing the fine ribs in FDM. The elements were delicate, and removing support material without damaging them was difficult.
2. Yellow PETG: testing another material
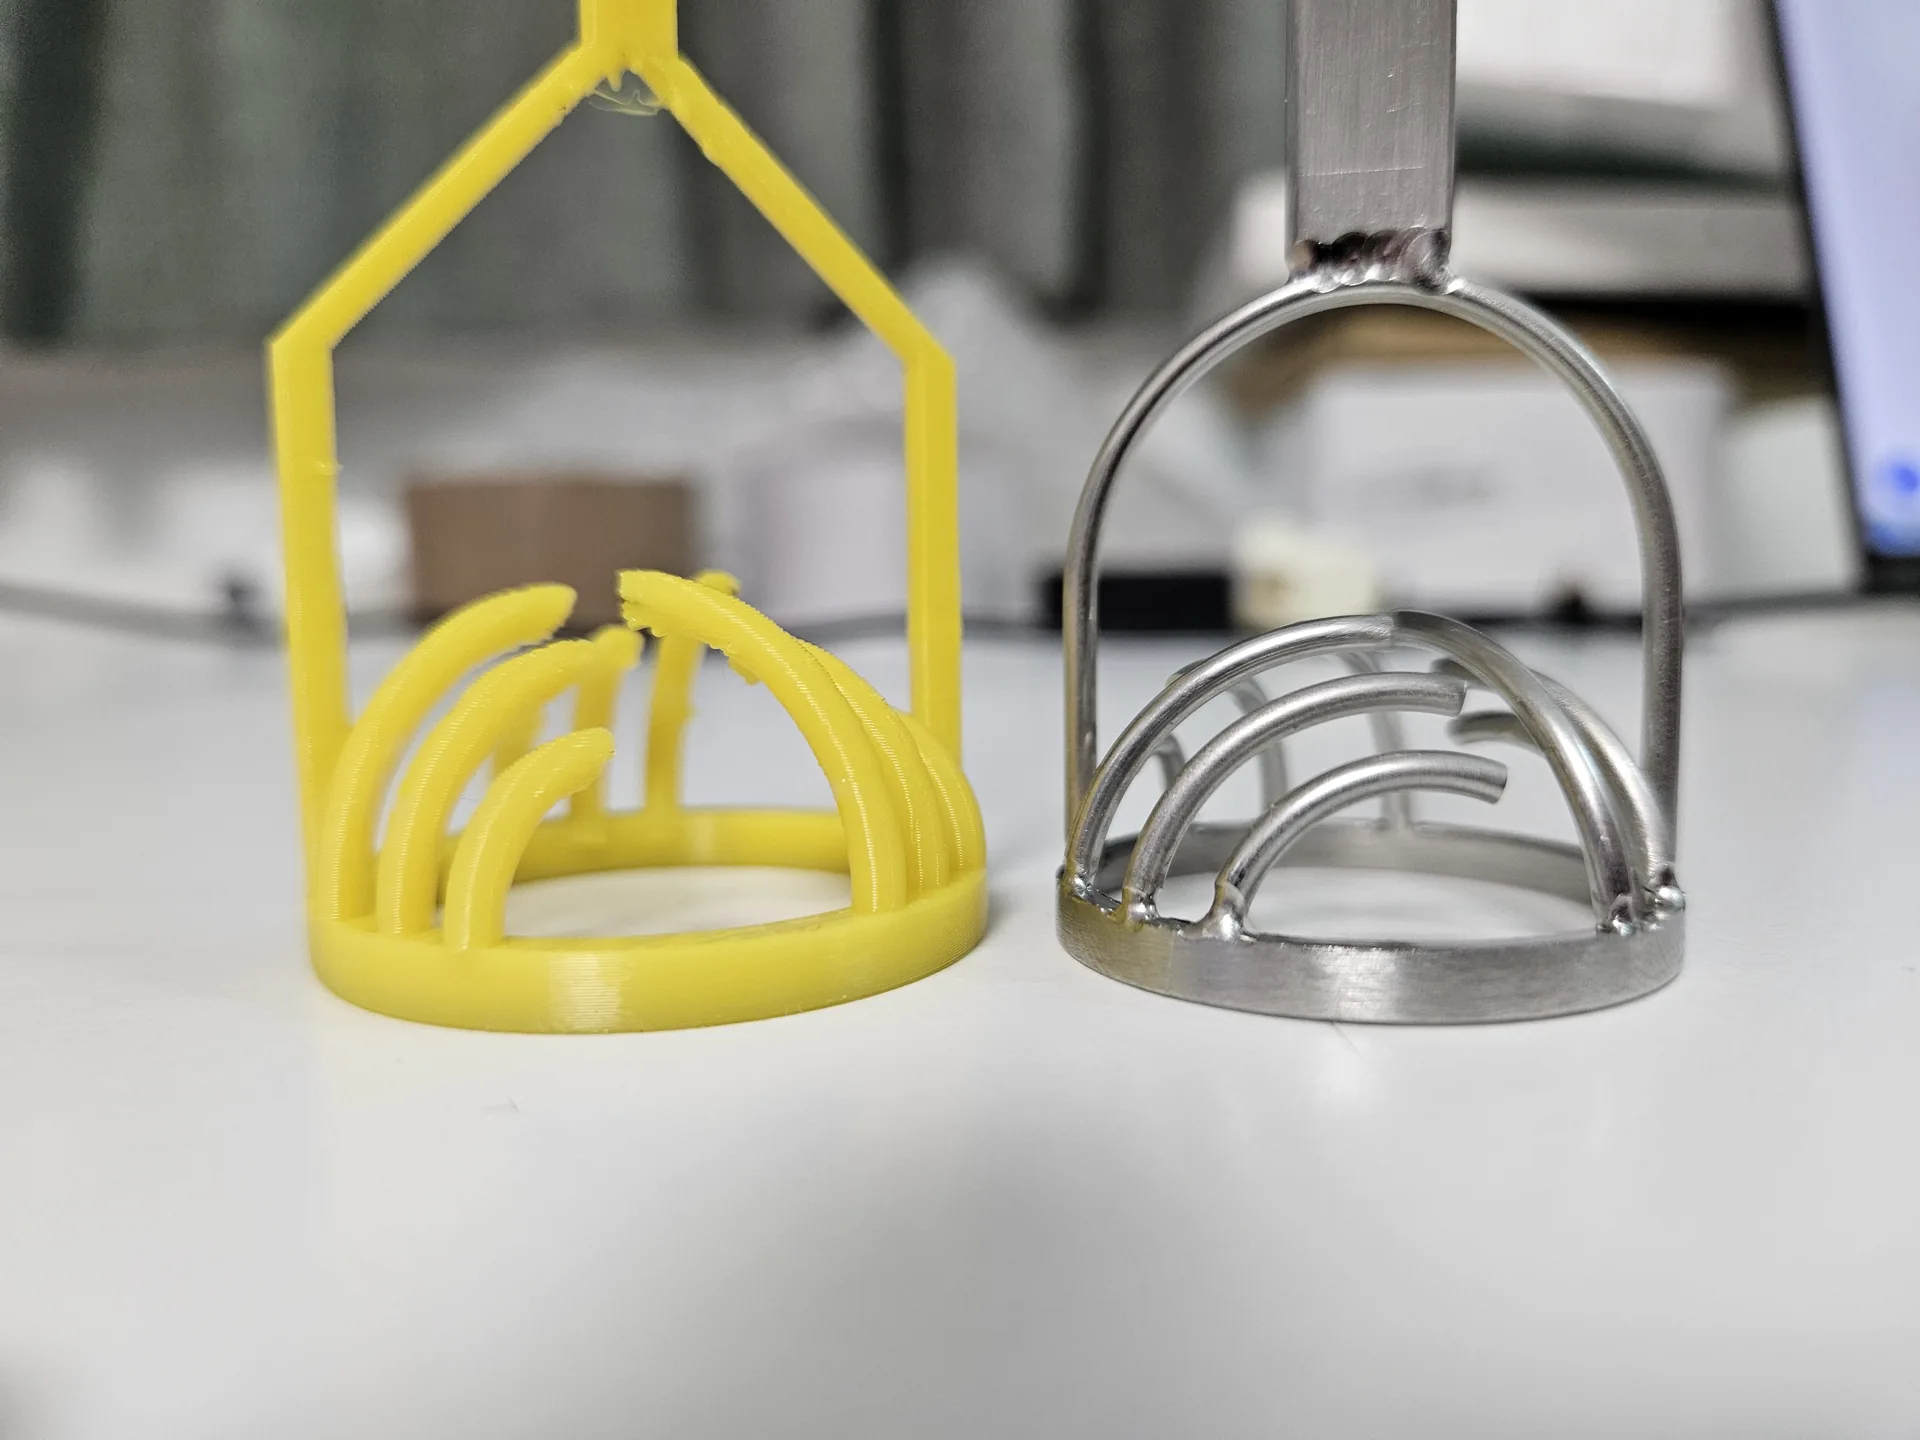
The second iteration explored PETG, shown in yellow in the photographs. We could compare the printed head directly with the metal reference and continue evaluating the same small features in a different material.
Material choice alone did not settle the question. The contact elements still had to be thin enough to reproduce the pattern, while remaining dependable in use. A prototype that reproduced the outline was only one step towards the intended application.
3. Reinforced PETG head with a separate PLA handle
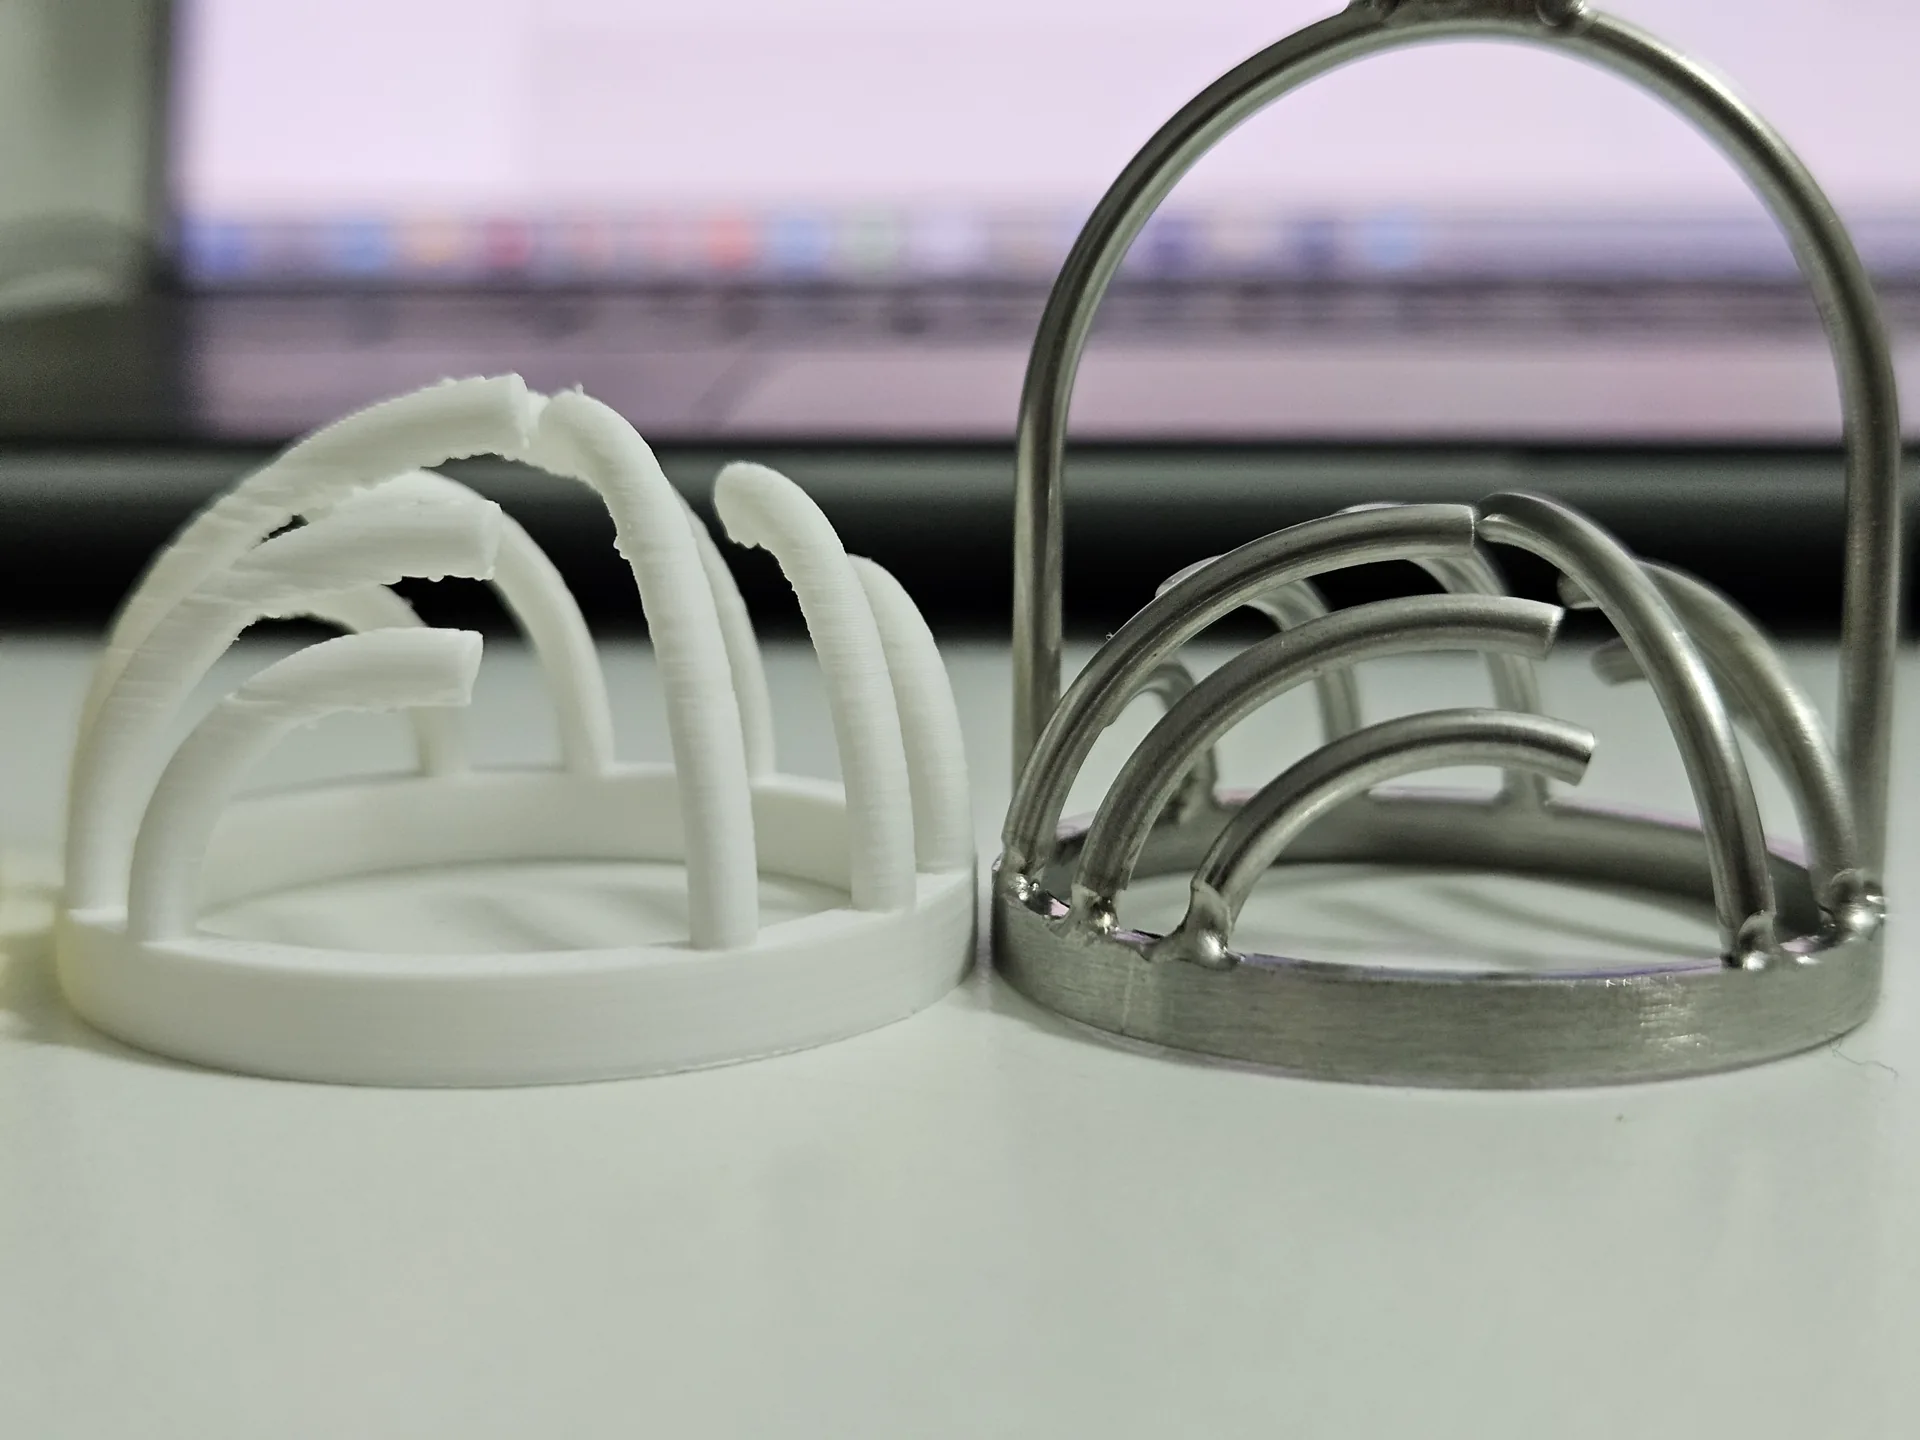
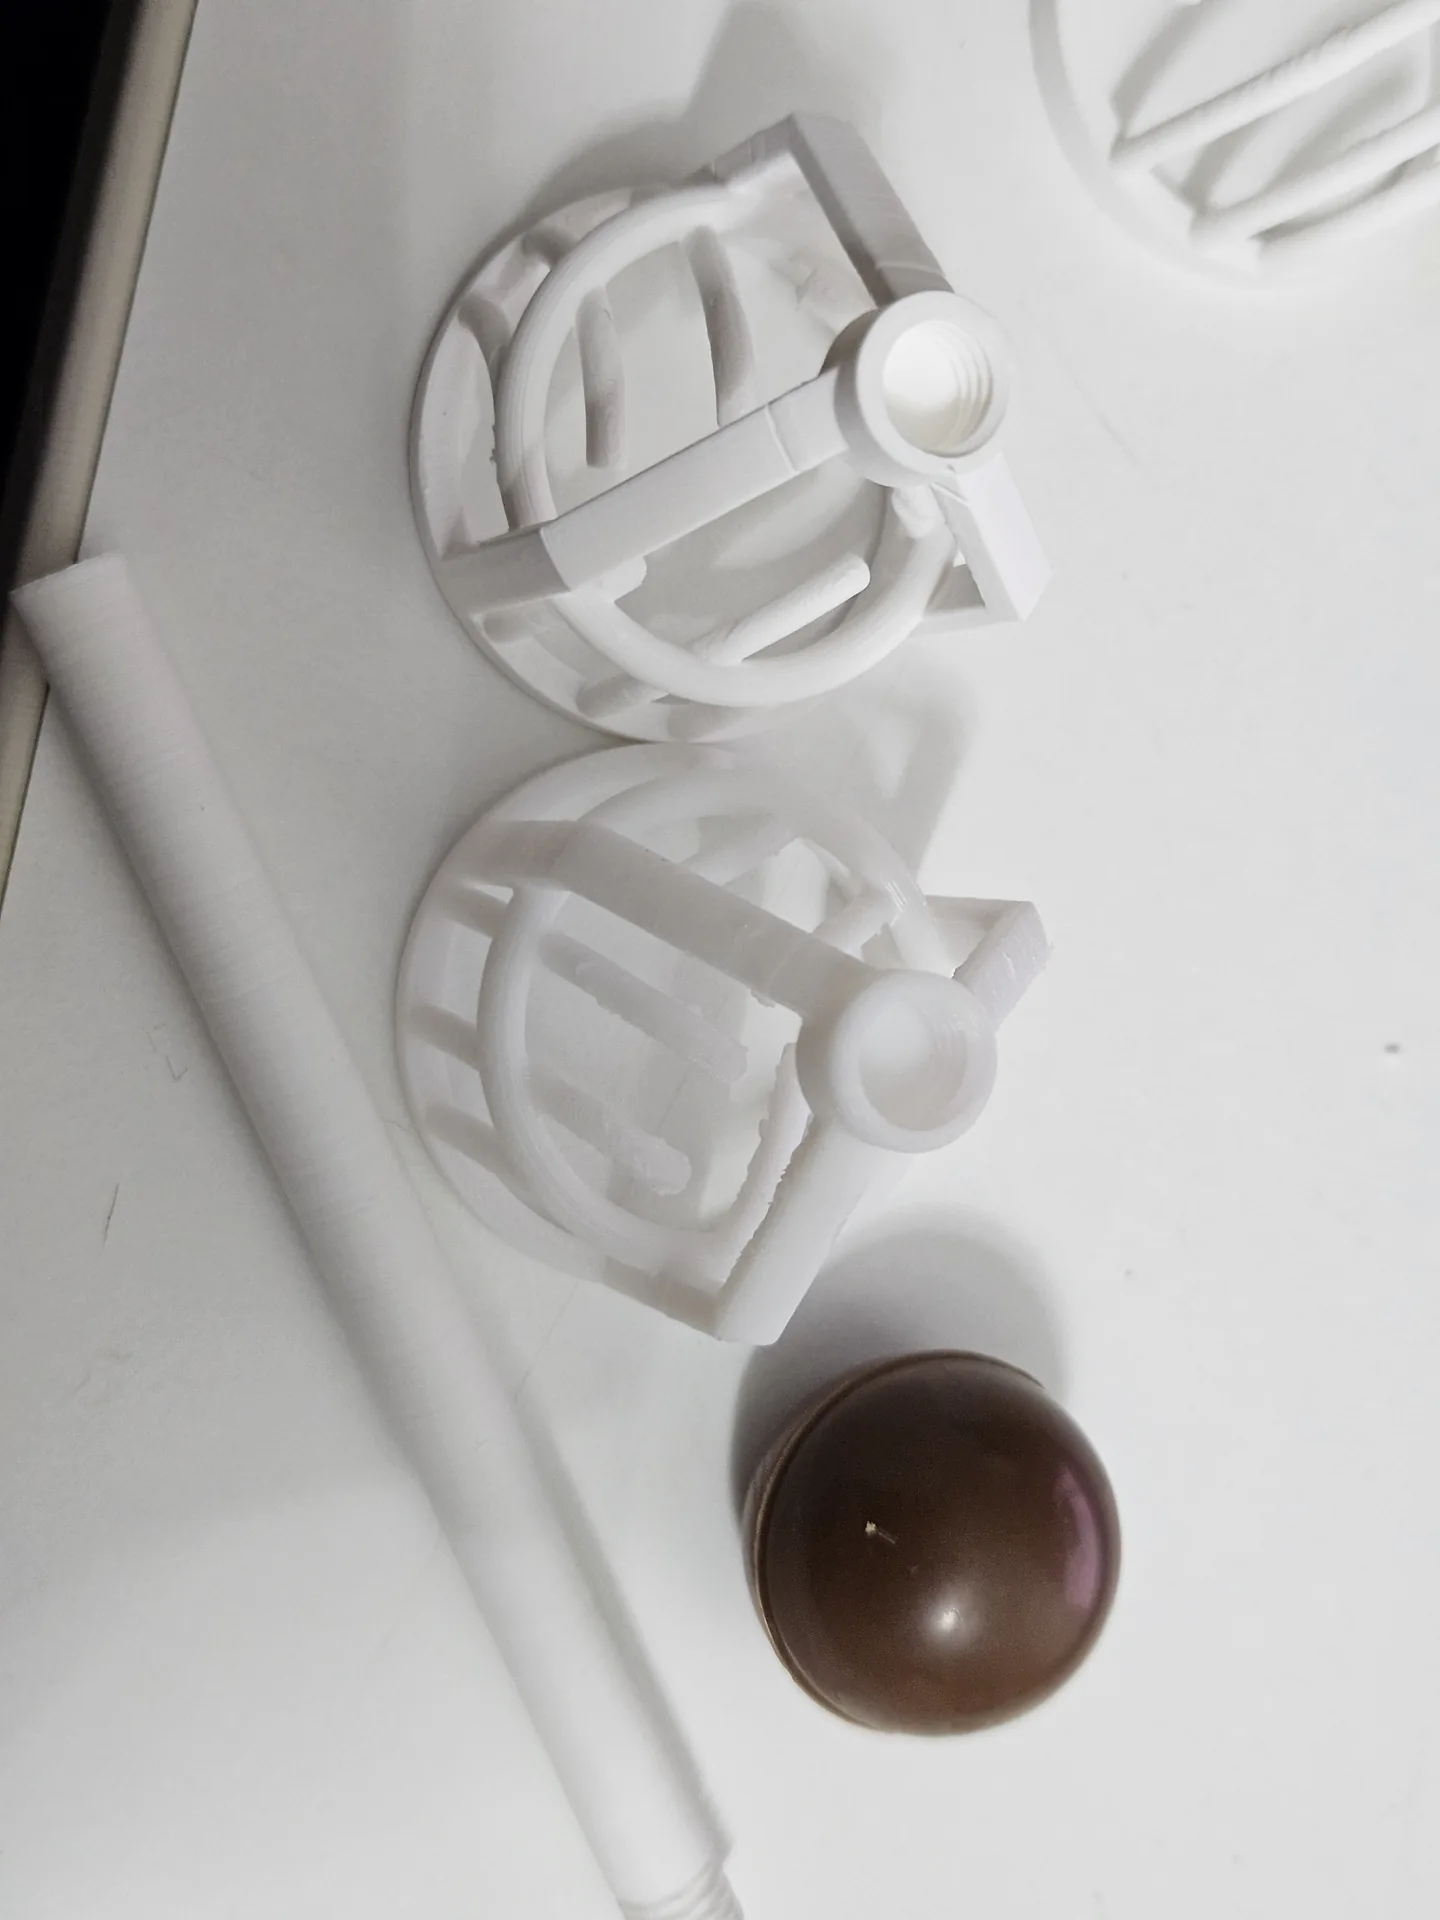
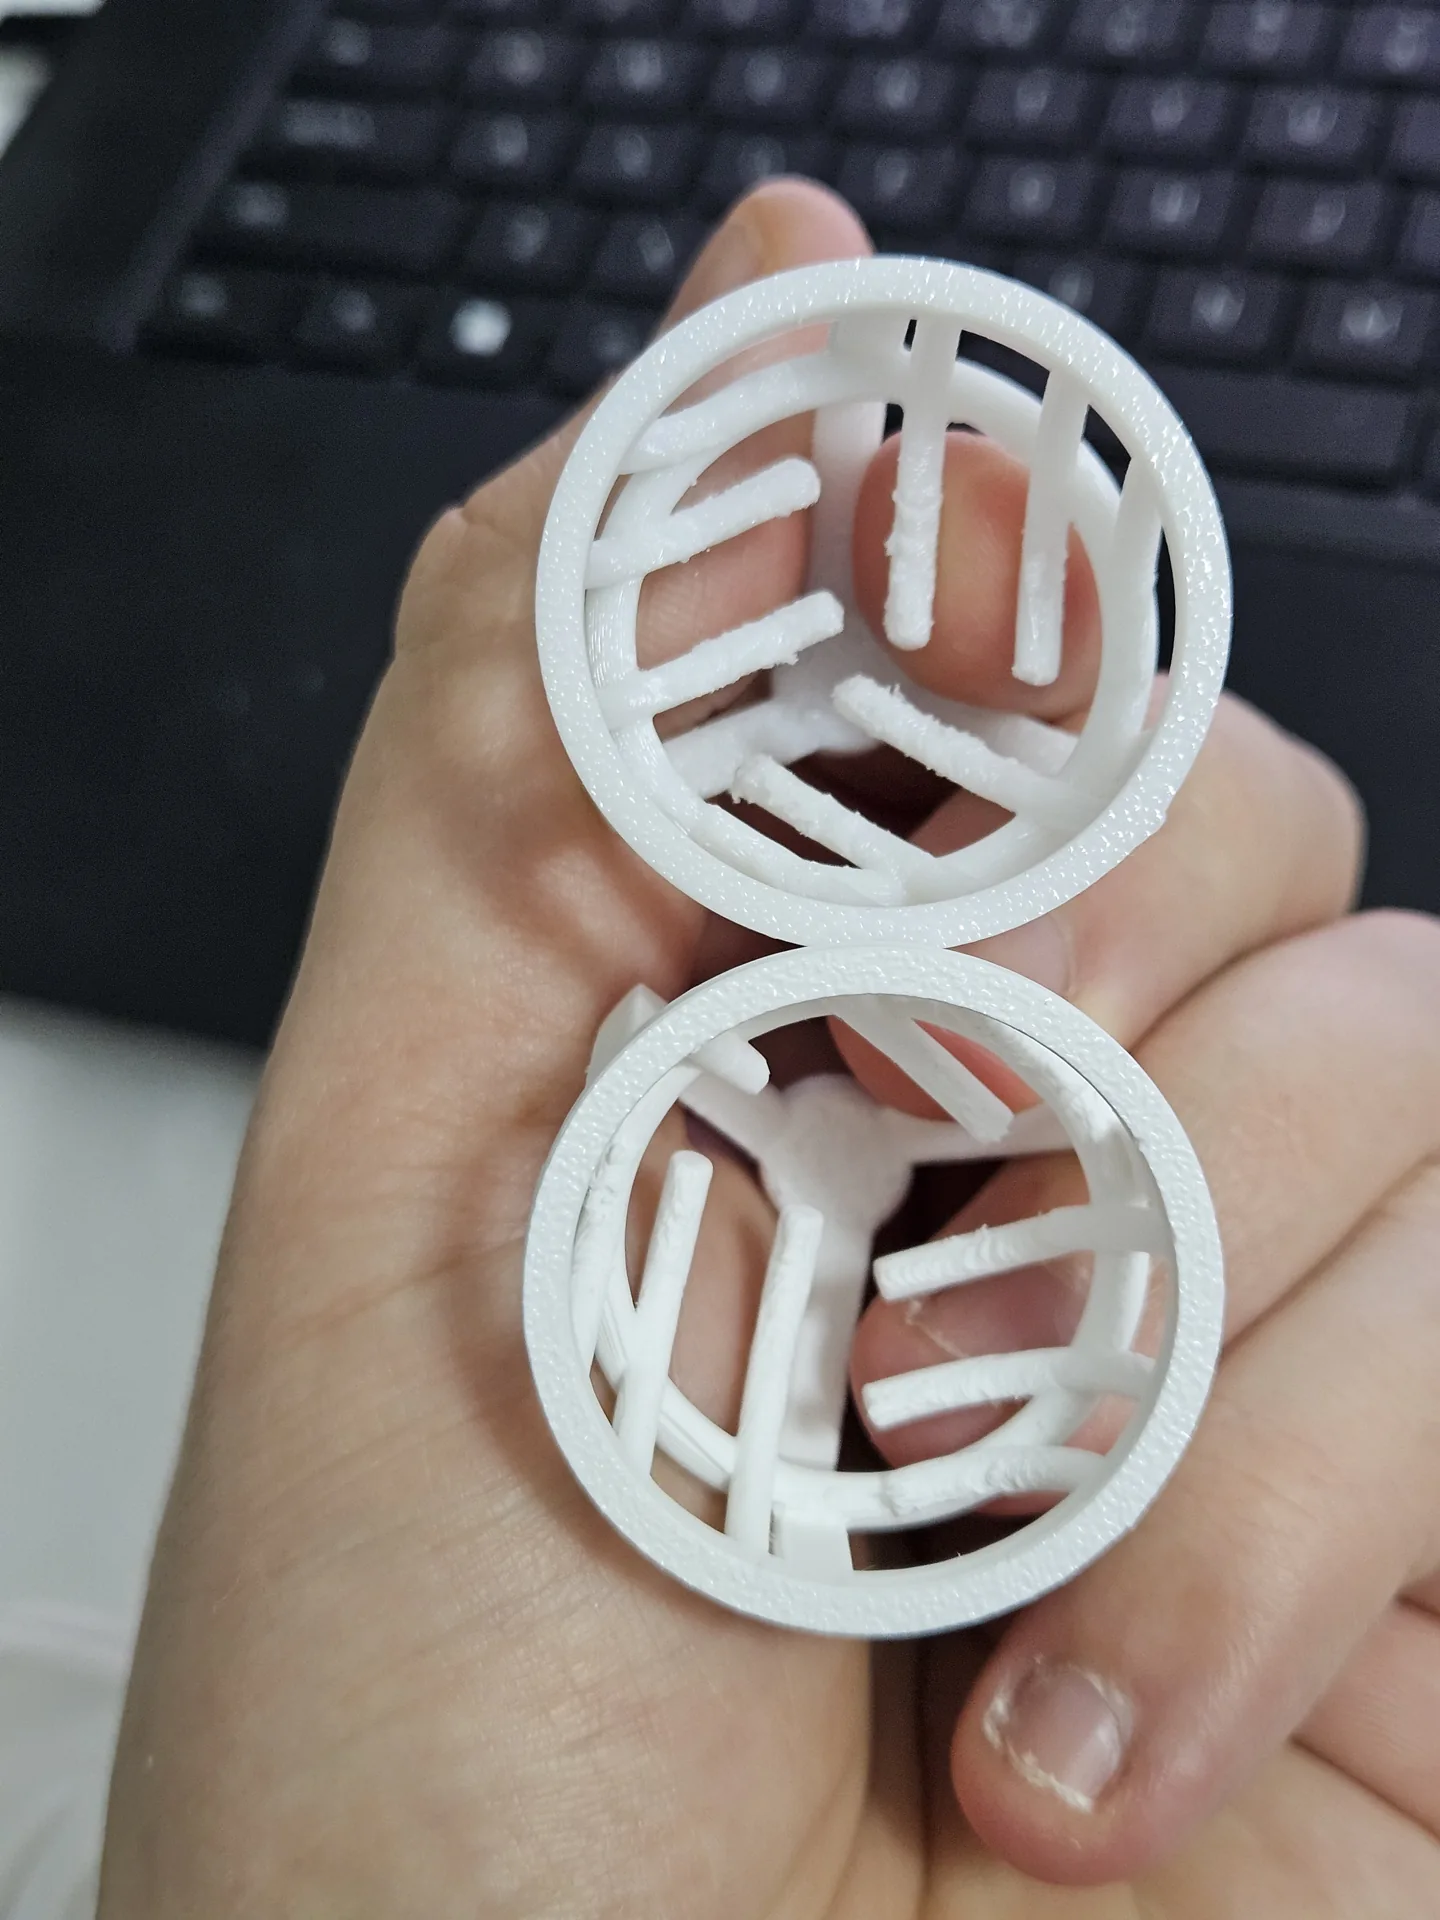
The third version changed the structure as well as the material arrangement. Its working head was white PETG, while the separate handle was PLA. This distinction matters in the photographs: the early white heads are PLA, but the later reinforced white head is PETG.
We added an outer ring to link and support the ribs, changed the handle support from two points to three, and introduced a threaded handle connection. These changes moved the design beyond simply copying the metal original. They addressed the weaknesses encountered while making the printed versions and allowed the head and handle to be treated as separate components.


The customer received test pieces, tried them and presented the revised design to the production team. Photographs and feedback travelled in both directions throughout the work. The reinforced version was well received by the customer, but the production decision depended on more than its appearance or fit.
Why the printed tool did not go into production
The decisive concern was a small piece of a rib breaking off and remaining unnoticed in the chocolate. The reinforced version did not provide enough confidence to dismiss that risk. The production team declined the plastic solution, and we shared their concern.
This was a potential failure mode identified during development, not a reported contamination incident. Nor was it a finding about chemical migration from a particular filament. For this project, the unresolved issue was the mechanical integrity of very small printed features in an application involving food.
The fit photographs and the client’s positive response to the revised design did not establish that the tool was suitable for production. We did not present the prototypes as food-contact certified or as an approved replacement for the original. Cleaning methods and a production validation process were not established as part of the work.
A clear result, even without a production batch
At the outset, we explained that this was an uncertain feasibility exercise and took no deposit. The arrangement was to discuss a price if the approach proved successful. When it did not, we charged no design or printing fee; the client had covered the shipping of the reference items and test pieces.
That was the arrangement for this particular exploratory project. The work involved three iterations, generally separated by two to five days of printing, shipping and discussion. It ended with a shared decision to stop, rather than a batch of five to ten production tools.
We suggested that the client speak to a specialist in small stainless-steel fabrication about reproducing the original in metal. That was a proposed next route, not a subsequent manufacturing outcome documented here. The customer remained satisfied with the effort and the candid explanation, and the project closed on good terms.
What the prototypes established
The work produced a CAD interpretation of the supplied tool, physical comparisons against real samples and a revised head with additional support. It also identified the constraint that mattered most: matching the shape did not resolve the risk of fine ribs breaking in the intended use.
For a client considering a replacement part, that distinction can be valuable early in development. A feasibility study can reveal where a printed solution needs further work—or where another manufacturing method deserves consideration—before a production order is placed.
Have an unusual part to reproduce?
An original part, clear photographs and a description of its use are useful starting points. Include the required quantity, what the part contacts, how it is handled and what would happen if a small feature failed. Those details help define what a prototype needs to demonstrate.
Explore our 3D design and file support and FDM printing service, or send a project brief to discuss the geometry and intended application.
Related
FDM 3D Printing
See build size, material choices and common functional use cases.
PETG
Tougher functional material guidance and common use cases.
Projects & examples
Browse more real-world projects across FDM, resin and batch production.
Get a Quote
Send your file or brief for an exact price and lead time.
Ready to print?
Send your file (or your idea) and we’ll reply fast with options and a clear quote.